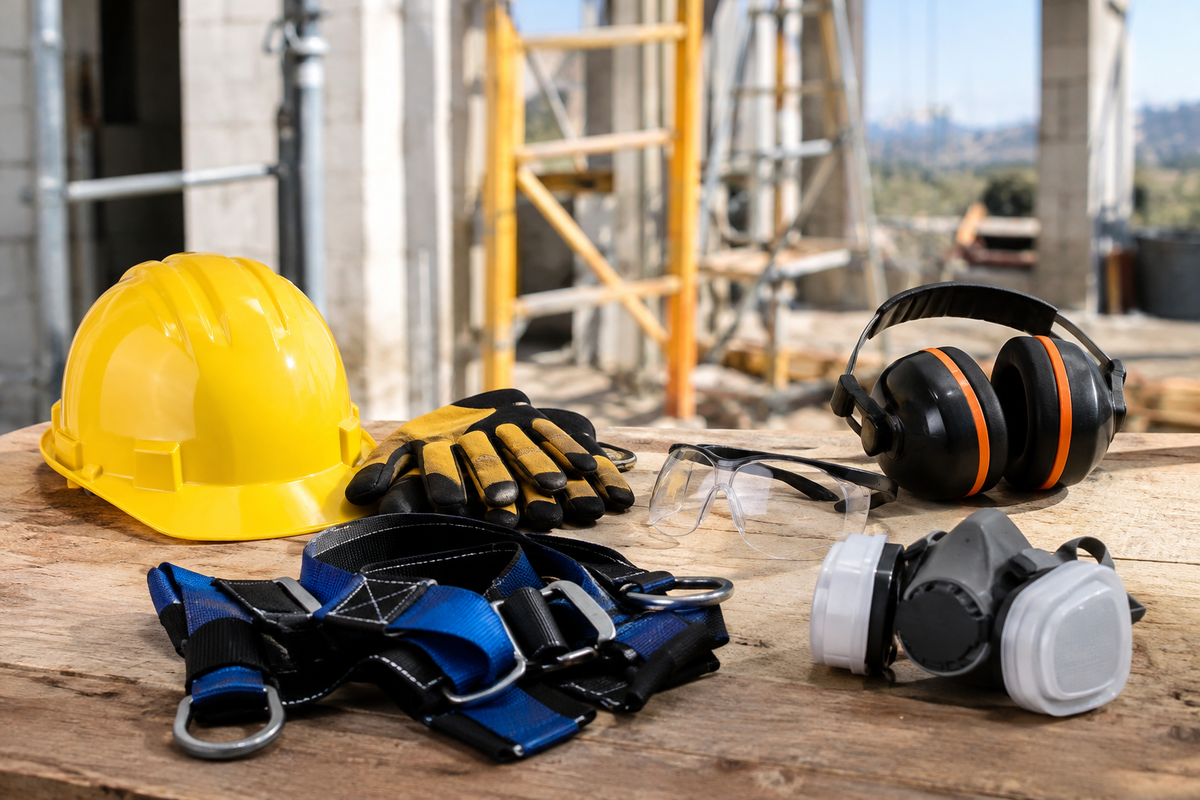
How to Choose Construction Site Safety Equipment That Is Suited to the Actual Risks
The right safety equipment for a construction site is equipment that addresses the specific hazards of your job, carries the appropriate certification, and can be worn all day without having to be removed. An expensive but ill-suited product offers less protection than a simpler model that is well-chosen and worn properly.
Assess the hazards at the construction site and verify the standards that apply to each piece of equipment
Start by making a list of the risks specific to your task—not those of a construction site “in general.” A formwork carpenter, an electrician, and a roofer do not face the same hazards. Ask yourself four simple questions:
- What objects might fall, cause splinters, or puncture the sole?
- Does the noise repeatedly exceed 85 dBA?
- Do you work at heights, near traffic, or near heavy machinery?
- Are you exposed to silica dust, concrete, solvents, or extreme temperatures?
Next, check the standards. In Canada, equipment must generally meet recognized standards, often those of the CSA (Canadian Standards Association) or ANSI. Here are some common guidelines:
- Helmet Standards: CSA Z94.1
- Eye protection: CSA Z94.3
- Safety shoes: CSA Z195
- High-Visibility Clothing: CSA Z96
- Fall Protection: CSA Z259
Look for the labeling directly on the product, not just on the packaging. For your province’s legal requirements, consult the applicable regulations as well as your employer or health and safety representative. Requirements may vary by jurisdiction.
Compare protection, comfort, compatibility, and cost before putting together your gear
Once the standards have been approved, compare the models based on four criteria. Comfort isn't a luxury: a helmet that slips, goggles that fog up, or boots that cause blisters will end up in the truck rather than on the job site.
| Criterion | To be verified | Common Mistake |
|---|---|---|
| Protection | Standard, class, strength grade | Choosing without reading the label |
| Comfort | Weight, fit, ventilation | Buy Without Trying It On |
| Compatibility | Combining with Other PPE | Overlay without testing |
| Cost | Service Life, Maintenance, Replacement | Focusing only on the purchase price |
Compatibility is often overlooked. Ear muffs must be able to attach to your helmet, and goggles must fit properly under a respirator. Always try on your equipment together, in actual work positions: arms raised, head tilted, crouching.
When it comes to your budget, think in terms of cost per month of use. A pair of high-quality boots worn daily for several months often ends up costing less than lower-end models that need to be replaced more quickly. First, prioritize gear that protects against the most serious risks, then gradually add the rest.
Before making any purchase, try on the equipment with the rest of your work attire. PPE that restricts your movement increases the risk rather than reducing it.
Equipment 1 through 3 for protecting the head, eyes, and ears
Once the hazards on the job site have been identified, protecting the head, eyes, and ears is the top priority: these three types of protective equipment address common, immediate, and sometimes irreversible risks. Here’s how to choose them so that they’re actually worn all day long.
Construction Hard Hat: Choosing the Right Level of Protection and a Secure Fit
A hard hat is the most important piece of safety equipment: it protects against falling objects, impacts, and—depending on the model—electrical hazards. In Canada, check that it complies with the CSA Z94.1 standard and look for the type and class on the shell.
- Type 1: Protection against impacts to the top of the head, suitable for most construction sites.
- Type 2: protection at the top and on the sides, useful when there is a risk of a side impact.
- Class E: electrical insulation up to 20,000 V; essential near live power lines or installations.
- Class G: insulation rated up to 2,200 V, for general use.
The fit is just as important as the standard. A ratchet harness allows you to tighten the headband precisely, and a 4-point chin strap keeps the helmet in place when working at heights or in a bent-over position. Replace the shell after a significant impact, even if there are no visible cracks, and check the manufacturing date indicated on the inside. A helmet exposed to sunlight, solvents, or extreme temperatures will deteriorate more quickly.
Safety glasses and 3. hearing protection: Choose the appropriate equipment based on the type of splashes and noise levels
Safety glasses (Equipment No. 2) must comply with the CSA Z94.3 standard and be selected based on the task at hand. For cutting, grinding, or drilling, choose wrapar-around glasses with side shields, or even a face shield worn over them. For fine dust or splashes, sealed goggles are safer.
- Anti-fog treatment: essential in cold weather or during strenuous activity.
- Tinted lenses: Best suited for outdoor use, with a light tint for shaded areas.
- Compatibility: Make sure they fit with your helmet, goggles, and eyeglasses.
Hearing protection (equipment No. 3) is required whenever noise exposure reaches 85 dBA over an eight-hour period. Earmuffs can be put on and taken off quickly, making them suitable for intermittent tasks. Earplugs provide good noise reduction and can be easily worn with a helmet or safety glasses. For very loud noise, such as that from a jackhammer, wearing both earplugs and earmuffs provides enhanced protection. Compare the noise reduction rating (NRR) and choose the level that reduces noise without isolating you from instructions or alarm signals.
To put together a reliable basic set of equipment, selecting the items most in demand among professionals is a good place to start:
No matter which model you choose, try these three items together before purchasing to make sure they’re comfortable and work well together over the course of a full day.
Items 4 and 5 for protecting the feet and hands
After the head, eyes, and ears, the feet and hands are the body parts most exposed to direct contact on a construction site: crushing, puncture, cuts, abrasions, or slips. Two types of equipment top the list for professionals: safety shoes or boots, and work gloves.
Safety Shoes or Boots: Comparing Toe Caps, Puncture-Resistant Soles, and Traction
A good safety boot combines three elements: a protective toe cap, a puncture-resistant sole, and a grippy outsole. In Canada, look for CSA certification (a green triangle indicating protection against punctures and impacts) and a reference to the CSA Z195 standard.
- Tip: Steel offers proven durability at a lower cost, but it is heavier and conducts cold. Composite, which is lighter and non-metallic, is better suited for Quebec winters and metal detectors.
- Puncture-resistant sole: essential whenever there are nails, screws, or rebar on the ground. It is made of steel or a flexible composite material.
- Traction: A rubber sole with deep treads provides grip on mud, gravel, or snow. For concrete slabs or oily surfaces, choose a sole that is oil-resistant and slip-resistant.
Don't forget about the upper: full-grain leather or a waterproof membrane protects against water, and a high-cut upper supports the ankle on uneven terrain. Always try on your boots at the end of the day, wearing your work socks, when your feet are slightly swollen. There should be about one centimeter of space in front of your toes, without your heel lifting out of the boot.
Work gloves: Choose the material and durability based on the tasks at hand
There is no such thing as a one-size-fits-all glove: the right pair depends on the task and the primary hazard. Check the resistance levels specified by the EN 388 standard (abrasion, cut, tear, and puncture); the higher the level, the greater the protection.
| Subject | Typical Use | Strength |
|---|---|---|
| Leather | Material Handling, Structural Steelwork | Durability, abrasion |
| Cut-resistant fibers | Sheet metal, glass, cutting | Cut resistance |
| Nitrile coating | Hardware, oil | Dexterity, Grip |
| Insulated lining | Winter Work | Warmth, Water Resistance |
For precision work such as screwing or laying cables, a thin nitrile-coated glove preserves your sense of touch. For formwork or handling rough materials, choose gloves with reinforced leather palms. If you’re using a rotating tool, avoid loose-fitting gloves that could get caught.
Helpful tip: Keep two pairs in your toolbox—a lightweight pair for precision work and a reinforced pair for heavy-duty tasks. Switching gloves depending on the task extends their lifespan and reduces the risk of injury.
To quickly compare tried-and-true models of boots, gloves, and other protective gear, check out Riobec Sécurité's selection of the most popular products.
Equipment 6 and 7 to combat poor visibility and dust
Once your feet and hands are protected, there are two less obvious but equally serious risks that still need to be addressed: not being seen by machinery and inhaling harmful particles. High-visibility clothing and respiratory protection round outthe basicsafety equipment for construction sites.
High-Visibility Clothing: Choosing the Right Class for Your Work Environment
The appropriate class of high-visibility clothing depends on traffic speed, the distance from vehicles, and the lighting conditions at the work site. In Canada, the CSA Z96 standard defines the classes and types of clothing based on the area of fluorescent material and retroreflective strips.
- Class 1: Areas with low traffic, away from vehicles, such as a warehouse or a materials yard.
- Class 2: Construction sites with moving machinery or moderate traffic—the most common choice in the construction industry.
- Class 3: Night work, high-speed roads, or poor visibility, with maximum body coverage.
For daytime work on a construction site, a high-visibility vest or Class 2 jacket is often sufficient. If you’re working near a highway, at night, or in rainy or foggy conditions, switch to Class 3, with sleeves and leg bands if necessary.
Also check the condition of the garment. Peeling strips, faded fluorescent color, or paint and mud stains reduce its effectiveness—in which case, it should be replaced. Choose a breathable fabric in the summer and a lined or waterproof version in the winter, so you won’t be tempted to take it off.
Respiratory Protection: Distinguishing Between Dust Masks and Respirators Based on Contaminants
A disposable dust mask is suitable for non-toxic dust and fine particles, while a cartridge respirator is required when dealing with vapors, gases, or hazardous contaminants such as crystalline silica. The choice should be based on the contaminant, not on comfort.
| Location | Appropriate Protection | Example |
|---|---|---|
| Plaster dust, wood | N95 Mask | Sanding Drywall |
| Silica, concrete, masonry | Half-mask with P100 filter | Concrete Cut |
| Vapors, solvents, paint | Cartridge respirator | Application of Chemicals |
A mask provides protection only if it fits snugly. A beard, a poor fit, or loosely fastened straps can cause leaks. For reusable respirators, many employers require a fit test, and it is recommended that you check for a proper seal each time you put one on.
A disposable mask is never a substitute for a cartridge respirator: it filters particles, not vapors or gases.
Replace the filters and cartridges according to the manufacturer's instructions as soon as breathing becomes difficult or you notice an odor. Store your respirator in a sealed bag, away from dust, to maintain its effectiveness.
Items 8 and 9 for preventing falls and protecting the knees
After visibility and air quality, the last two components of this construction site safety equipment address very different risks: falls from heights, which can be fatal, and the gradual wear and tear on joints, which develops over several years.
Fall arrest harness: Check the fit, anchor points, and compatibility with the system
A fall arrest harness is effective only if it is properly fitted, connected to a reliable anchor point, and compatible with the rest of the fall arrest system. It never provides protection on its own: it is part of a chain consisting of the harness, the lanyard or self-retracting fall arrester, the connector, and the anchor point.
Before each shift, take a few minutes to check the equipment:
- Inspect the straps: check for cuts, fraying, burns, or signs of chemical exposure.
- Check the loops, the D-ring on the back, and the seams, as well as the fall indicator, if there is one.
- Adjust the thigh and chest straps: you should be able to slide one flat hand under the straps, but no more.
- Place the back ring between your shoulder blades, making sure there isn't too much slack, which could cause the harness to ride up during a fall arrest.
- Make sure the anchor point is certified and located above you to minimize the fall distance.
Compatibility is just as important as the quality of the harness. A lanyard that is too long, an unsuitable connector, or a non-compliant anchor point can negate the protection. Also check the rated capacity indicated on the label, taking into account the user’s weight along with their tools, and compliance with Canadian standards (CSA Z259). A harness that has been used to arrest a fall must be taken out of service immediately.
Key takeaway: An improperly fitted harness can cause serious injuries during a fall arrest, even if it functions perfectly. Take the time to adjust it properly, and don't rush through it at the start of the day.
Knee pads: Compare built-in, removable, and cushion models based on duration of use
Choosing the right knee pads depends mainly on how much time you spend on your knees: a cushion is sufficient for occasional tasks, whereas an integrated or removable model is necessary for tiling, formwork, flooring, or roofing. Prolonged work on hard surfaces can lead to inflammation of the bursa, a common injury in the construction trades.
| Type | Ideal Use | Strength |
|---|---|---|
| Built into the pants | Everyday Use | No accessories to wear |
| Removable with straps | Long periods of kneeling | Stable support while on the move |
| Cushion on the floor | One-time tasks | Cost-effective and fast |
Built-in models feature pants pockets into which foam inserts are slipped. They offer decent comfort, but protection is limited if the foam is too thin. Removable knee pads with a rigid shell provide better pressure distribution, as long as the straps don’t compress the back of the knee. These pads work well when you change positions frequently or alternate between standing and squatting.
When choosing, check the thickness of the foam, the shell's resistance to sharp objects, and how easy it is to clean. Replace any crushed inserts: foam that no longer regains its shape no longer provides protection.
Practical FAQ on Buying, Wearing, and Maintaining Construction Safety Equipment
There is no single piece of equipment that is universally considered a priority: priority depends on the hazards present at your workstation. That said, a basic set of protective gear is essential almost everywhere: a hard hat, safety shoes or boots, safety glasses, appropriate gloves, and high-visibility clothing. This basic set covers the most common risks, including head injuries, punctures, flying debris, and collisions with machinery.
Next, depending on the task, add the following: hearing protection when working near noisy tools; respiratory protection when cutting or sanding dusty materials; a safety harness whenever you’re working at heights; and knee pads for work on the ground. In all cases, the priority remains to eliminate or reduce the hazard at its source, with personal protective equipment serving as a last resort.
Compliant equipment bears a legible marking indicating the standard it meets (CSA, ANSI/ISEA, or another standard depending on the product) and, often, its class or level of protection. This marking can be found on the label, on the helmet shell, or inside the shoe. If the information is missing or illegible, do not take any risks.
To determine if you're a good fit for this position, follow these steps:
- Identify the hazards associated with your task (falling objects, electricity, moisture, noise, dust).
- Compare these risks with the specifications provided by the manufacturer.
- Review the health and safety regulations that apply to your province or industry.
- Try on the gear in a real-world setting, along with your other protective gear, to ensure it's comfortable and fits properly.
If you have any questions, consult your health and safety manager or a personal protective equipment specialist.
Inspect your equipment before each shift, and replace it as soon as it shows signs of damage or after a significant impact. There is no universal timeframe: always follow the manufacturer’s instructions, which often specify a maximum service life from the date of manufacture.
Some practical tips:
- Helmet: Cracks, deformation, a discolored shell, or worn-out suspension are signs that the helmet needs to be replaced, even if there has been no apparent impact.
- Shoes: A smooth sole, an exposed toe cap, or an open seam render the shoe ineffective.
- Gloves: If they have holes, have become stiff, or have lost their grip, they must be replaced.
- Harnesses: Harnesses with frayed straps, damaged seams, or those that have been involved in a fall must be taken out of service and inspected by a qualified person.
- Respiratory protection: Replace the filters or cartridges when breathing becomes difficult or you notice an odor.
Yes, as long as you check that they are compatible. Improperly combined equipment can compromise the seal, fit, or visibility. For example, ill-fitting goggles can cause leaks around a respirator, and earplugs are often more practical than earmuffs under a helmet with a visor.
To avoid unpleasant surprises, try on all your gear together before starting work. Make sure the harness isn’t restricted by clothing that’s too thick, that the knee pads don’t limit your mobility, and that the high-visibility garment remains clearly visible over the other layers. Comfortable gear is also more likely to be worn all day long.